
My mother loves making crafty things and has been doing so
for many years. She can take an item and
turn into something unique and not at all what the object was intended for
originally. When she and I started a
small craft business, we displayed our wares at a local antique and craft
mall. We rented a booth that we paid for
monthly and here we brought all types of crafts we’d made. When the craft mall closed its doors, we were
left with a lot of stock and nothing to do with it. We then began the craft show circuit.
Some of the items that she made for the craft mall and the
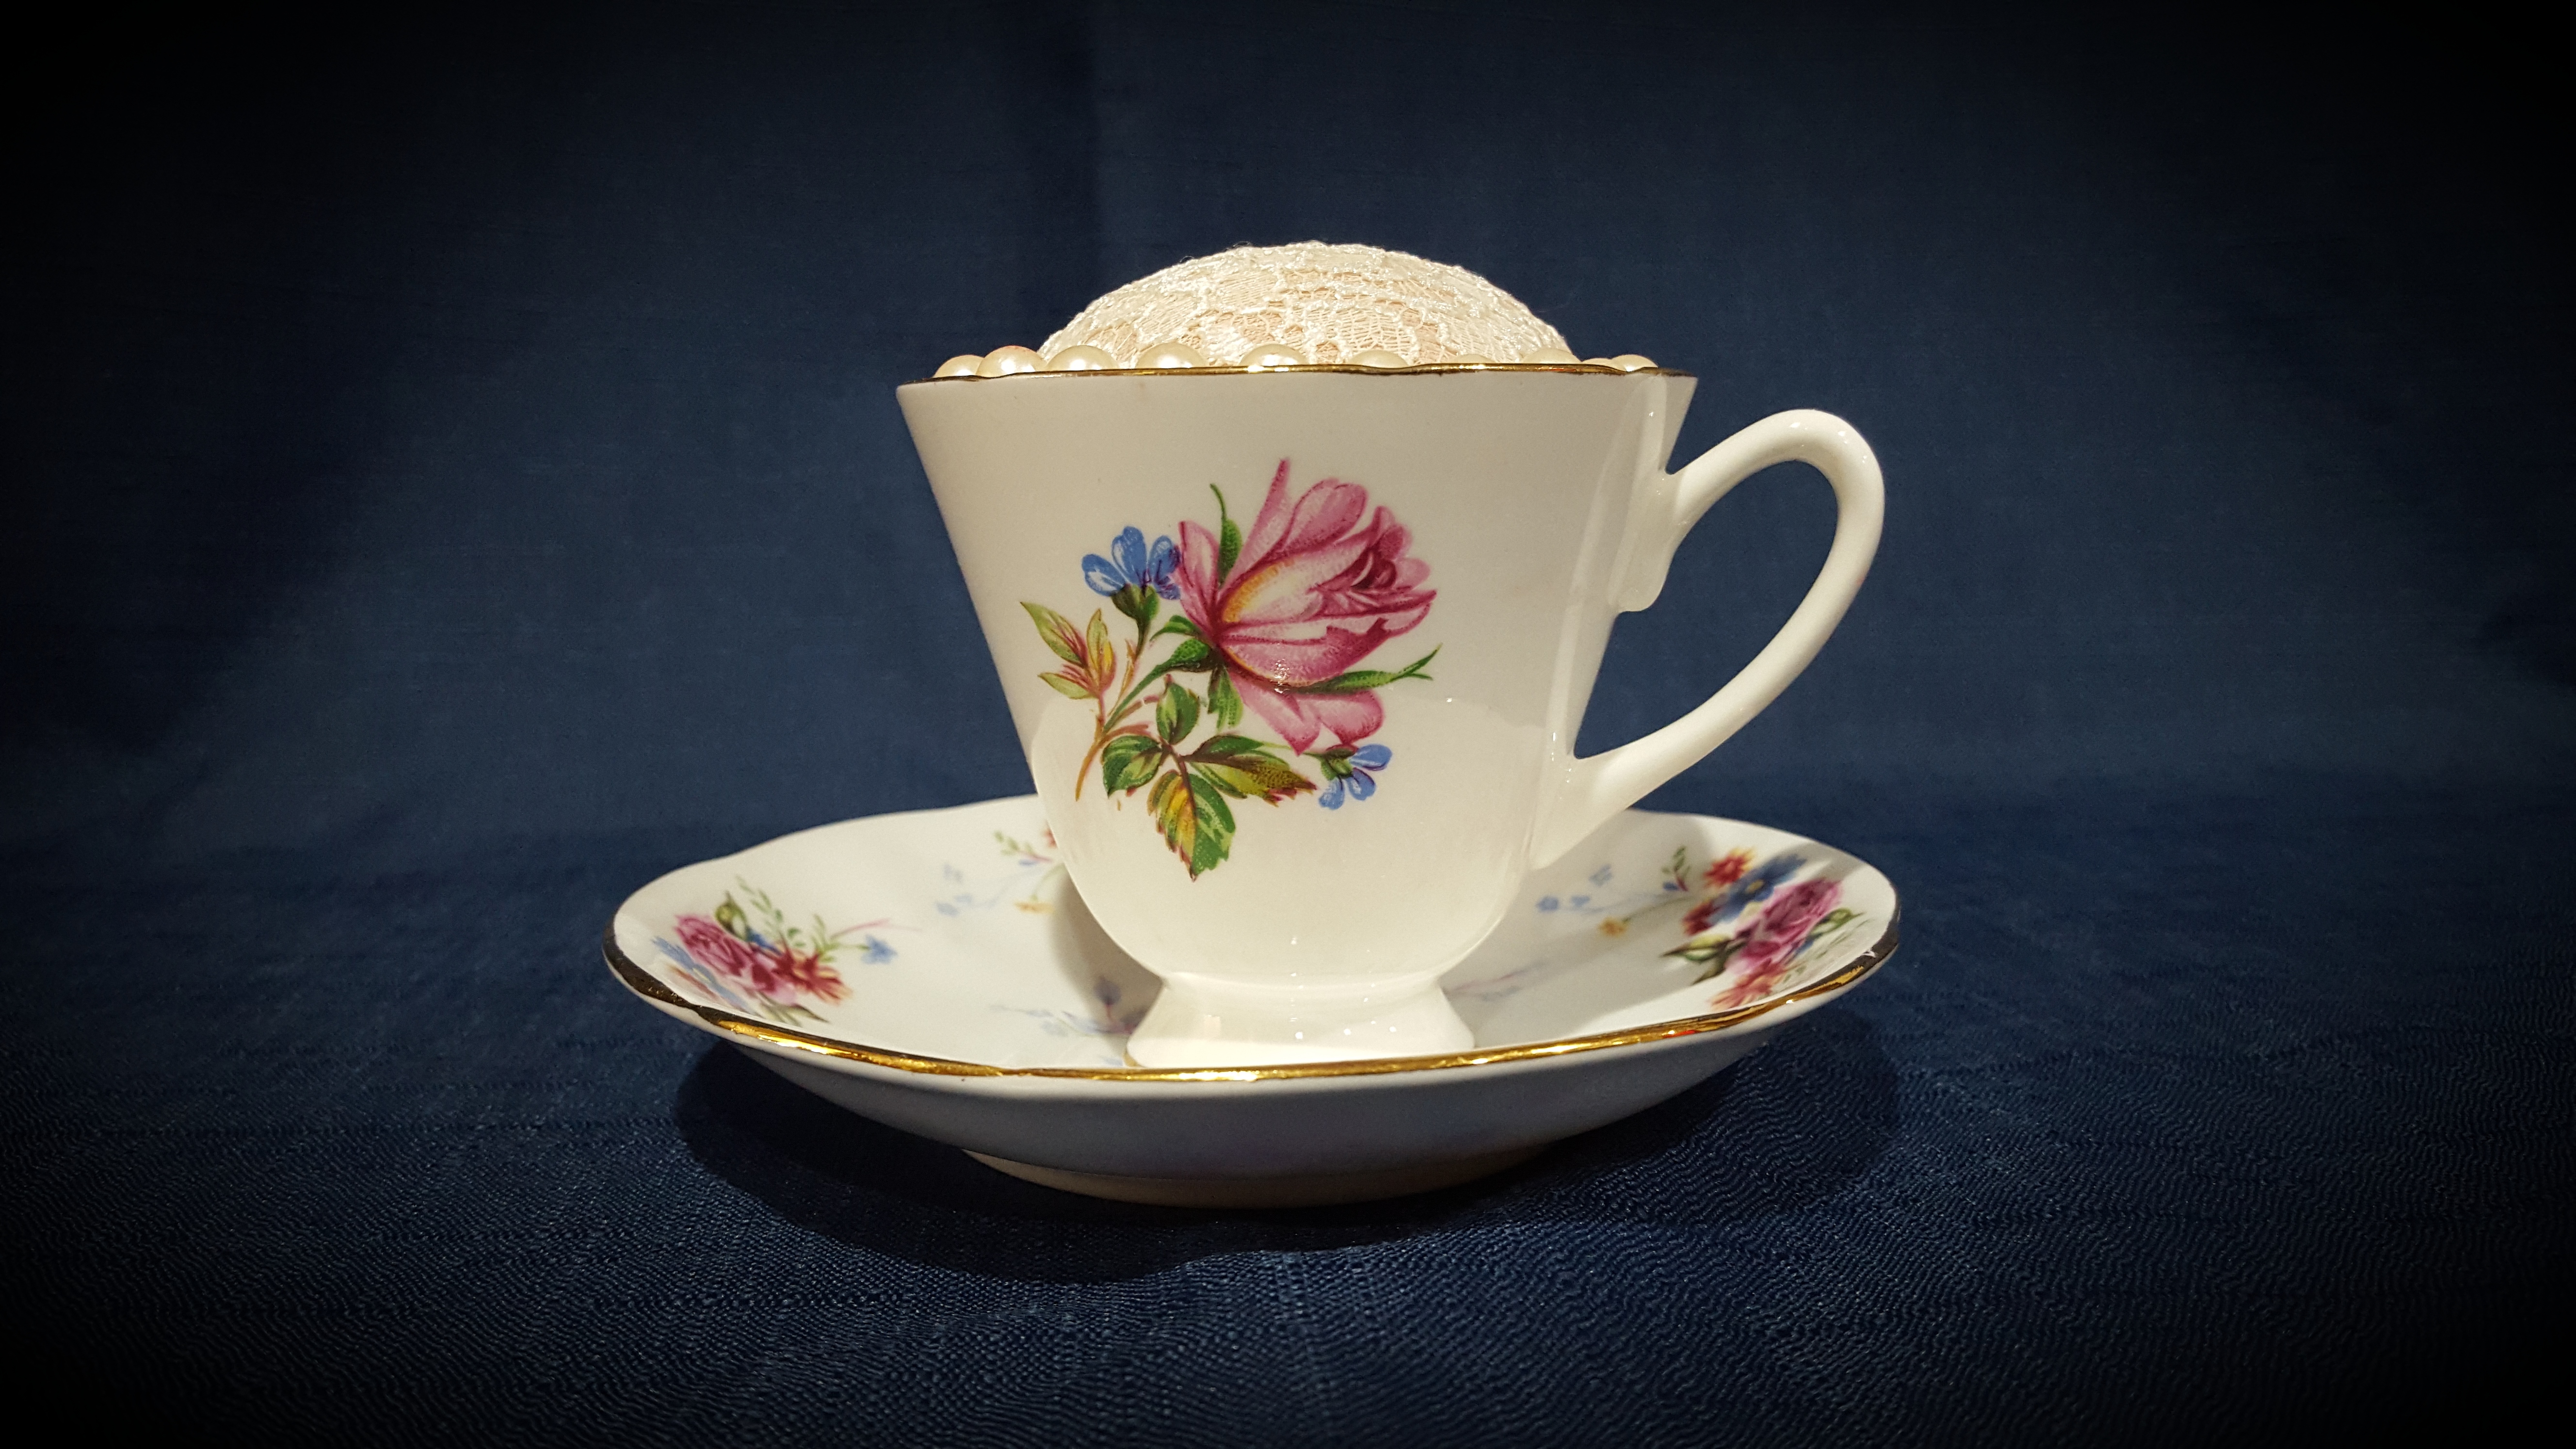
craft shows were pin cushions made out of various items. Today, I’m featuring a pincushion that my
mother made out of a vintage teacup and saucer she purchased at a garage
sale. Making a pin cushion from a teacup
is the perfect gift for the person in your life that sews or does any type of
needlework. The transformation of the
teacup and saucer from its well-known and intended use into an item contrary to
its nature is rather easy to do and makes a very unique gift sure to please
anyone on a special day or for no particular reason.
You can use any type of cup and saucer. The cup can even be chipped at the top since,
as you design and create your masterpiece, the chip can be covered with material,
beads, or your choice of decorative items. I would recommend that you only use an opaque cup since you will be
gluing a foam ball into the cup and it would then be seen if the cup is clear.
Your list of supplies include:
1. The teacup and saucer of your choosing
2. Glue gun & possibly a spray adhesive
3. Foam ball in a size that nests in the cup – cut in half –
that way you can make two if you would like
4. Fabric to cover the foam ball
4. Matching beads, material, or other decorative items to
trim the covered foam ball in the cup
The first thing to do is to cover the top half (visible
part) of the foam ball with the fabric you’ve chosen, using glue or other type
of spray adhesive (make sure to follow the directions regarding
use/ventilation/spraying methods). After
the material is securely fastened to the ball, set it in the cup to make sure
that it sits right and that you have completely covered the visible parts of
the foam. After you determine that the
fabric covered Styrofoam ball is the way you want it, use the hot glue gun (be
careful not to melt the foam) and secure the ball, fabric side up, in the
cup. The final step is to decorate the
inside edges of the cup (to help hide any imperfections in the material or
foam) and cover any chips that the cup may have around the top edges.


.png)


.png)

.png)

